Pepper – Golden Marconi, Snapper

pp127-golden-marconiI recently moved into a condo, and there is plenty of room to do some growing out on the balcony.  The balcony faces east, so it gets a lot of direct sunlight from sunrise until about 1-2 PM.  The balcony gets quite warm, so I will grow some plants that like the heat: peppers!

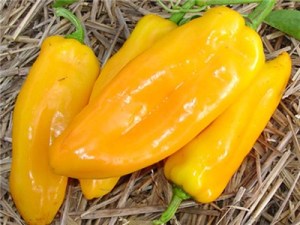
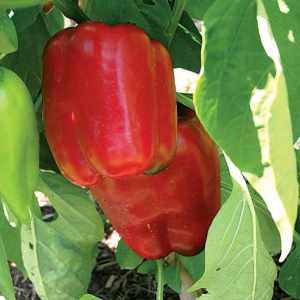
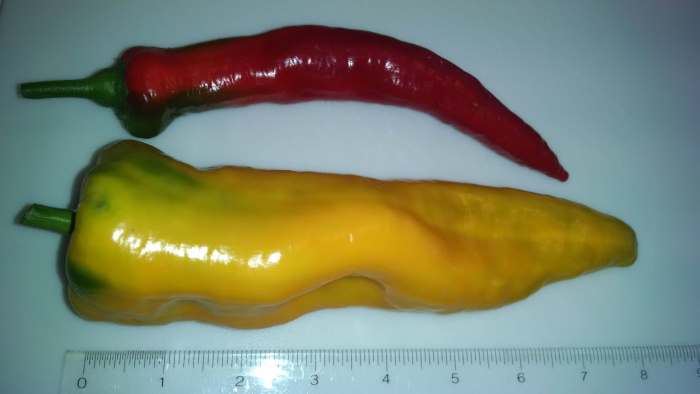
I grew Golden Marconi peppers a few years ago, and the yield and taste were very good.  I will also grow the Snapper variety, which is another bell pepper variety.  Neither of these peppers are considered ‘hot’.

Jun 19 = Day 0.  Plants started from seed: Golden Marconi (Baker Creek), Snapper (Park Seed). Seeds (3) sowed into one 1.5 inch rockwool cube in 2 inch net-pot.  Moistened with Seedling Blend, a dilute blend of fertilizers.  N-P-K (in ppm): 22-12-13.  Covered with plastic wrap until seeds have germinated.

Jun 29 = Day 10.  Seeds are germinating.  Placed in a sunny window for 4 hours per day, and then under a fluorescent light (spiral bulb, 23W, color = 6500k) for 8 hours per day.  The bulb emits a lot of heat, so the bulb is positioned 7-8 inches above the plants.

IMG_20180629
Jun 29 = Day 10
IMG_20180703
Jul 3 = Day 14

Jul 9 = Day 20. Plants transferred to small plastic jars containing 3 cups of Regular-Strength Blend.  N-P-K (in ppm): 103-41-168.

IMG_20180713_154846802
Jul 13 = Day 24

The plants receive about 4 hours of sunlight in the morning, and then they are supplemented with a fluorescent light bulb for an additional 8 hours in the afternoon.  My set-up is not fancy, I just use a clip-on light from my local hardware store.

IMG_20180713_175714369_HDR
Jul 13 = Day 24

Jul 19 = Day 30.  Installed plants into 5-gallon buckets containing Regular-Strength Blend.  N-P-K (in ppm): 103-41-168.  The plants are placed outside on my balcony.  I have been putting them outside for a few hours each day to try to harden them up, but they still tend to wilt in full sun, so I will use a 70% shade cloth for the first few weeks.

IMG_20180719_191910679
Jul 19 = Day 30.  Golden Marconi (left) and Snapper (right).
IMG_20180719_192341304 (1)
I slid tomato cages over the buckets, and then covered the plants using 70% shade cloth.
IMG_20180719_192407441 (1)
I covered the front and top with shade cloth, but left the back open to get good airflow.
IMG_20180807_094229358 (1)
Aug 7 = Day 49.  Golden Marconi (left) and Snapper (right).

Aug 7 = Day 49.  The plants are growing quickly now, and are starting to produce flowers.  Since the plants are starting to get tall, garden tape was used to secure them to the metal cages.  I took the shade cloth off the plants to expose them to full sun, but my outdoor growing location is just too hot (90-100 °F), and all leaves became wilted within 1 hour!  So I reinstalled the shade cloth, and the plants are OK now.

Aug 26 = Day 68.  The plants are getting tall, so the shade cloth was completely removed.  There are several flowers on each of the plants.  Upon lifting the buckets, I can tell that there is very little fluid remaining, so I added fresh fluid (Regular-Strength Blend) to each plant:  Golden Marconi (1 gallon), Snapper (1.5 gallons).

IMG_20180826_155756961_HDR
Aug 26 = Day 68.  Golden Marconi (left), Snapper (right).
IMG_20180826_161857336
A pepper developing on the Snapper plant.

Aug 30 = Day 72.  Added Regular-Strength Blend (1.5 gallons) to each plant.

Sep 3 = Day 76.  Added Regular-Strength Blend (2 gallons) to each plant.

Sep 12 = Day 85.  Added Regular-Strength Blend (2 gallons) to each plant.  Lots of peppers are now developing on both plants.

IMG_20180912_184758268 (1)
Sep 12 = Day 85.  Golden Marconi (left), Snapper (right).
IMG_20180912_184909302 (1)
Snapper peppers developing.
IMG_20180912_184920538 (1)
Golden Marconi peppers developing.

Sep 20 = Day 93.  Added Regular-Strength Blend (1.5 gallons) to each plant.

Sep 30 = Day 103.   Added Regular-Strength Blend to each plant: Golden Marconi (2.5 gallons), Snapper (1.5 gallons).  A few of the Golden Marconi peppers were showing signs of sunscald (too much direct sun exposure), so some of the exposed peppers were loosely wrapped in foil to prevent further sun damage.

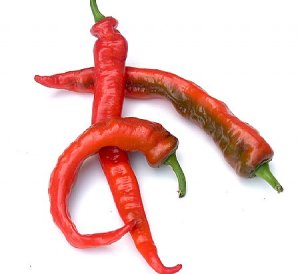
Oct 7 = Day 110.  Harvested 3 Golden Marconi peppers.

IMG_20181015_122829747
Oct 15 = Day 118.  Golden Marconi (left), Snapper (right).  Lots of ripe peppers!

Oct 15 = Day 118.  Added Regular-Strength Blend (1.5 gallons) to each plant.  Harvested 1 Golden Marconi and 5 Snappers.

IMG_20181015_181537005
Oct 15 = Day 118.  Today’s harvest.

Oct 19 = Day 122.  Harvested 2 Golden Marconi peppers.

IMG_20181022_093643701
Oct 22 = Day 125.  Golden Marconi (left), Snapper (right).

Oct 22 = Day 125.  Harvested 3 Golden Marconis and 4 Snappers.  This was the last of the Snapper peppers, but the Golden Marconi still has several peppers ripening on the plant.

IMG_20181022_094548487
Oct 22 = Day 125.  Today’s harvest.

Oct 28 = Day 131.  Harvested 2 Golden Marconi peppers.

Oct 29 = Day 132.  Added Regular-Strength Blend to each plant: Golden Marconi (1.5 gallons), Snapper (1 gallon).

Nov 10 = Day 144.  Harvested the final 6 Golden Marconi peppers of the season.  Even though there is plenty of fluid remaining in the buckets, the plants are looking poor and are losing leaves.  Plants were discarded at this time.  Approximately 1 gallon of fluid remained in each bucket.

Final statistics:
Total harvest for each plant: Golden Marconi = 17 peppers, Snapper = 9 peppers.
Total fluid used by each plant: Golden Marconi = 17.5 gallons, Snapper = 16.5 gallons.

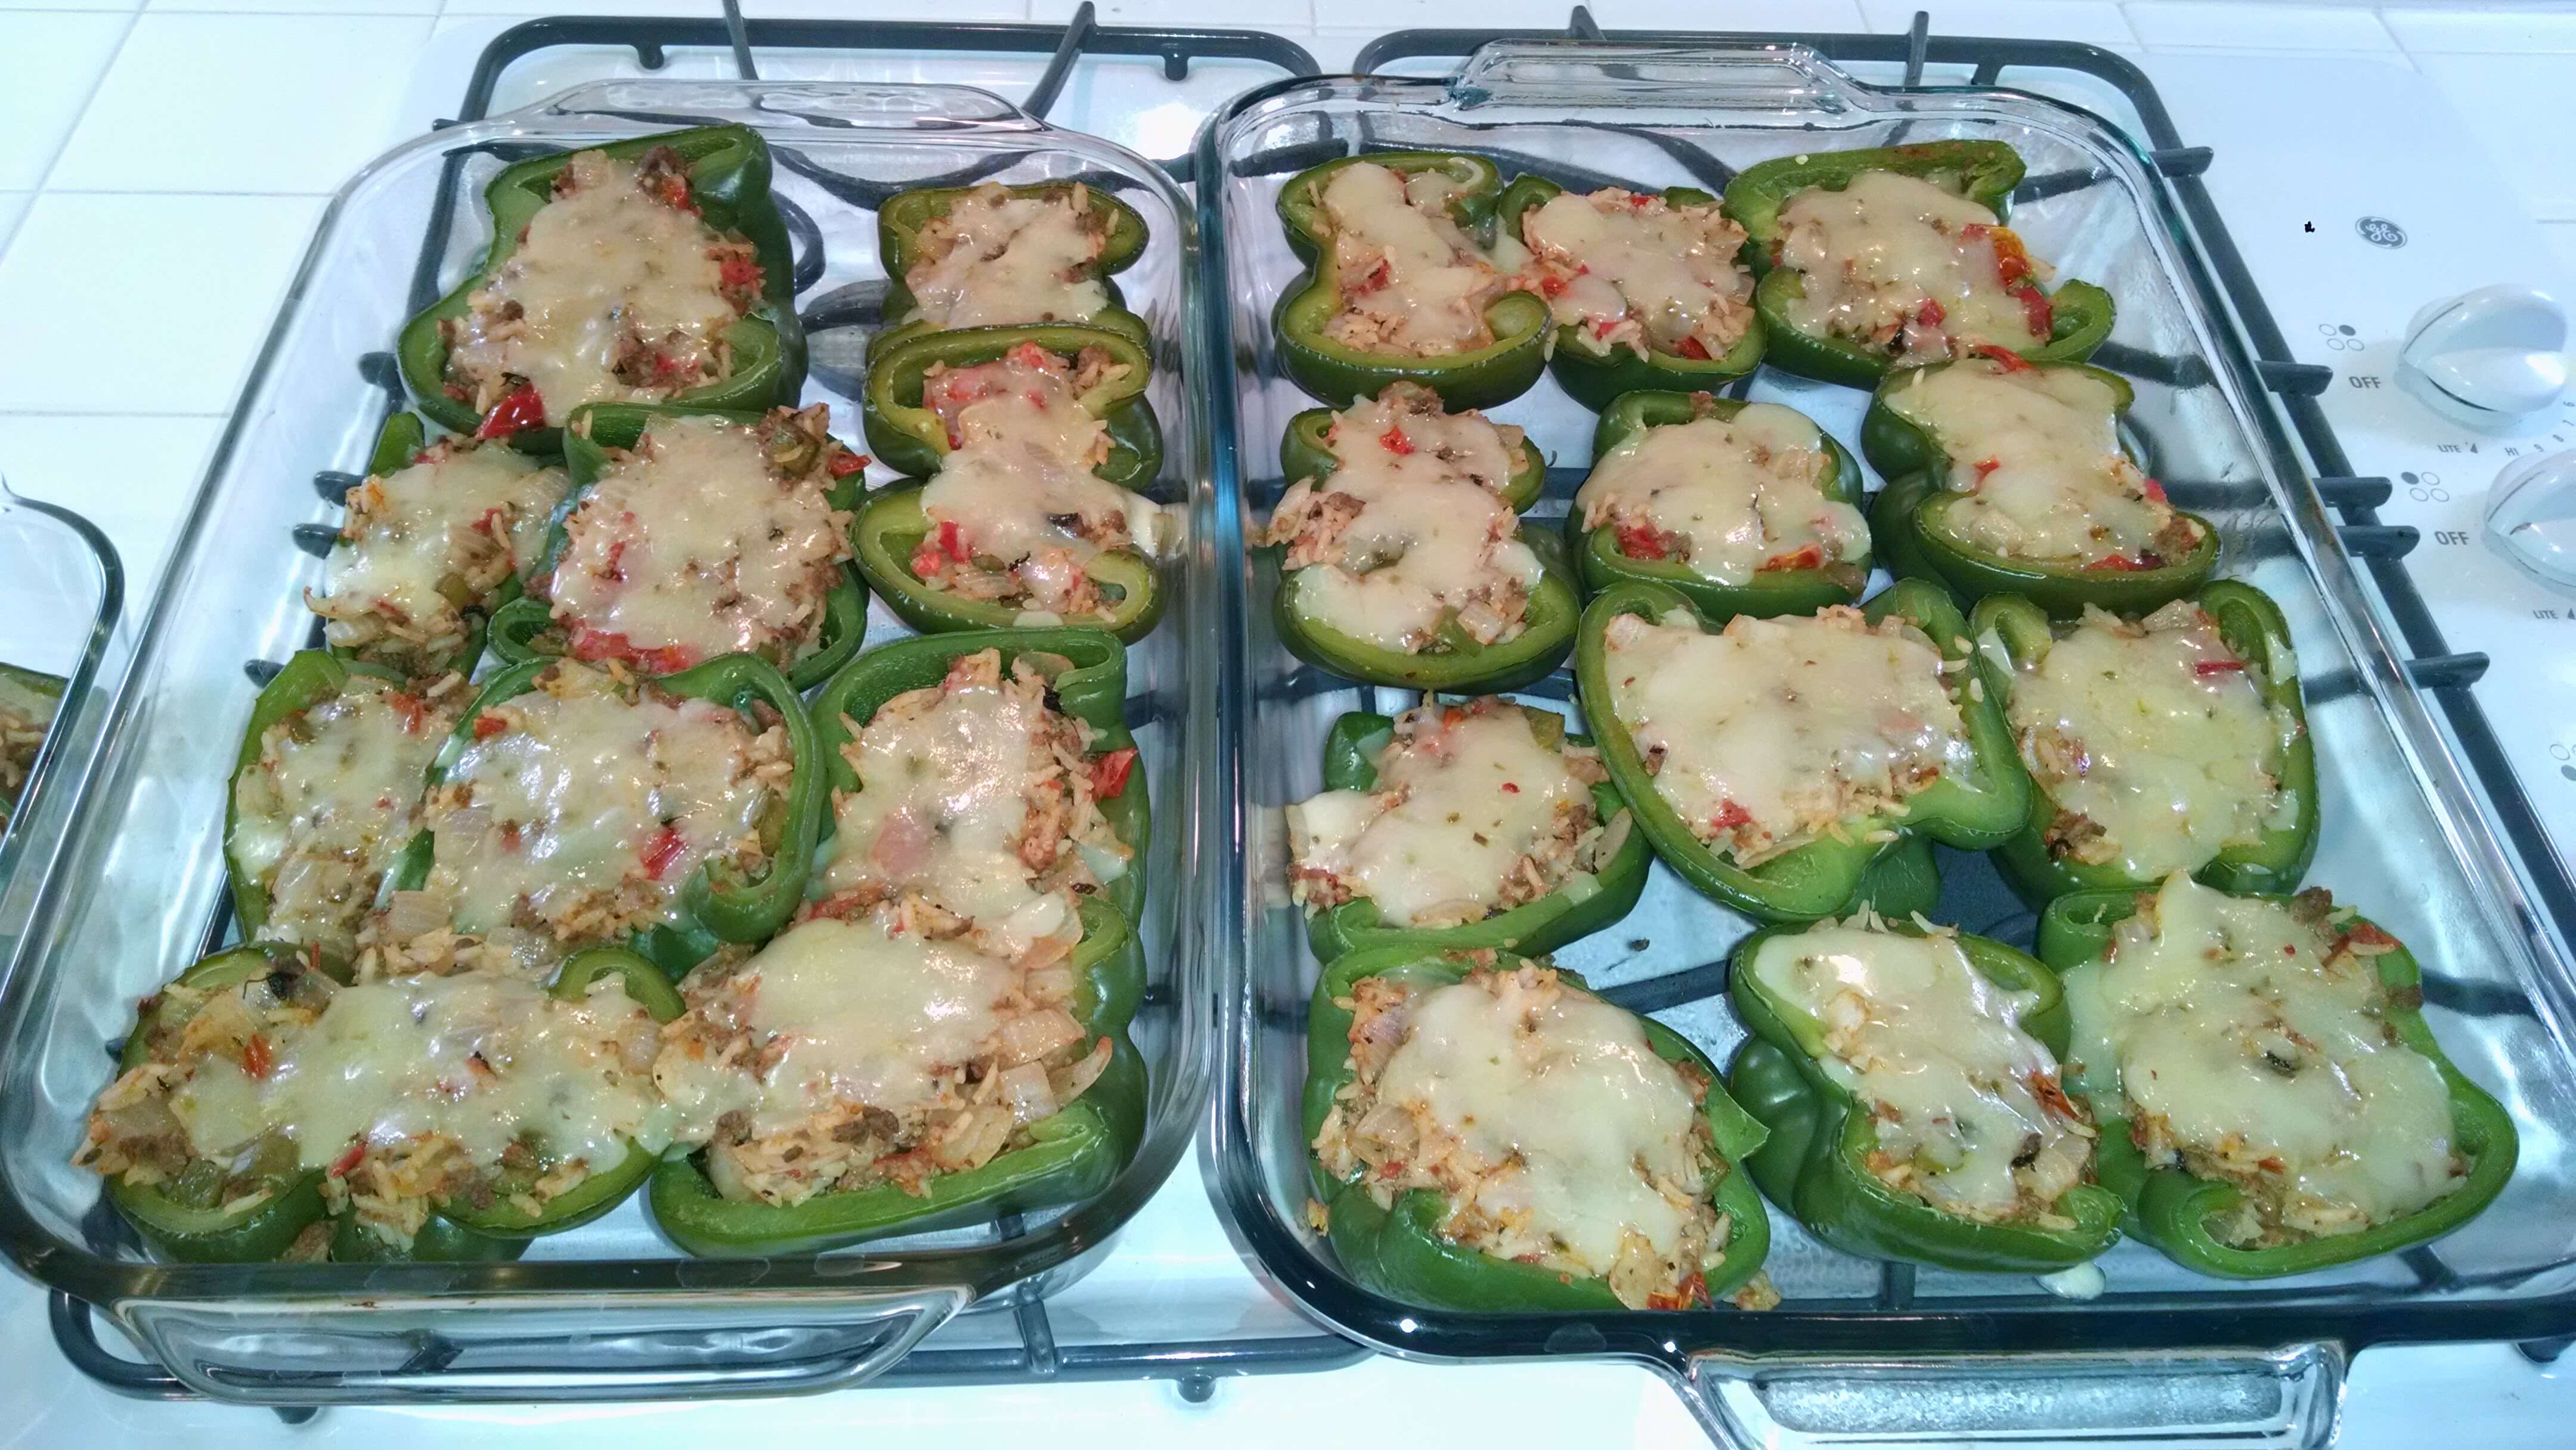
The Golden Marconi and Snapper peppers turned out great.  Juicy, crispy, and sweet.  I enjoy slicing them up and cooking them on top of a pizza:

IMG_20181021_202530173_HDR
A Golden Marconi pepper sliced and cooked on a pizza.

Another great way to use peppers is to include them in Quinoa Salad:

IMG_20181021_183351915_2
Quinoa Salad.

Quinoa Salad

Ingredients:
3.5 cups water
2 cups dried quinoa
1/2 cup pine nuts
1 large bell pepper, diced.  (I normally use a yellow, orange or red pepper.  Today I used 2 Golden Marconi and 2 Snapper peppers.)
1 English cucumber, diced
1 pint cherry tomatoes, sliced in half
1 bunch of fresh cilantro
1 lime
2/3 cup olive oil
1/3 cup rice vinegar
1/2 tsp salt
1/4 tsp black pepper, ground

Boil water in a pot on High heat, then add the quinoa and turn down to Low heat.  Cover and simmer for 10-13 minutes, until quinoa is cooked and has absorbed all the water.  Quickly cool the quinoa by either spreading it out on a large plate and placing in the fridge, or by surrounding the whole pot of cooked quinoa in a larger vessel of ice water.  Set this aside.

To toast the pine nuts, add the nuts to a small frying pan or skillet.  Cook on a stove over Medium heat.  As the pan gets warm, keep stirring the pine nuts until they are toasted (takes about 5 minutes).  Do not let them burn!  Then, put the pine nuts on a plate to cool.

In a large bowl, combine the peppers, cucumber, tomatoes, and cilantro (just the leaves, no stems).  Squeeze the juice of the lime over the mixture.

In a separate cup, combine the olive oil and vinegar.  Stir vigorously with a fork until it forms an emulsion.  Then stir in the salt and black pepper.  Pour this dressing over the cut vegetables and mix.

Add the cooled quinoa and the toasted pine nuts, mix, and enjoy!  Makes about 8 servings.

Pepper – Snapper

52574-pk-p1Jun 6, 2016 = Day 0.  Plant started from seed (Park Seed Co.).  Seeds sowed in 1.5-inch rockwool cube in 2-inch net-pot.  Moistened with dilute fertilizer solution: 1.2 mL (1/4 tsp) Dyna-Gro Liquid Grow, 0.8 mL pH Down per gallon of tap water.  N-P-K (in ppm): 22-12-13.

Jun 14 = Day 8.  Plant germinated, placed directly under a fluorescent light (2 ft. T8 bulb, 17W, 6500k) for 16 hours per day.

Jun 25 = Day 19.  Installed plant into 11 cup plastic container.   Hydroponic solution is composed of 11 cups (0.69 gal, 2.6 L) tap water, 1.38 g MasterBlend 4-18-38, 1.38 g calcium nitrate, 0.69 g magnesium sulfate, 0.14 mL Dyna-Gro Pro-TeKt, 0.7 mL pH Down.  N-P-K (in ppm): 103-41-168.

IMG_20160626_105001910 (1)
Jun 26 = Day 20

Jul 2 = Day 26.  Starting to let this plant have a few hours of outdoor exposure, to toughen up the plant.

Jul 8 = Day 32.  Plant is now outside all of the time, receiving 4-5 hours sunlight per day.

Jul 17 = Day 41.  Plant installed in 32-gallon bucket.  Hydroponic solution composed of 32 gal (121 L) tap water, 64 g MasterBlend 4-18-38, 64 g calcium nitrate, 32 g magnesium sulfate, 6.4 mL Dyna-Gro Pro-TeKt, 35.2 mL pH Down.   N-P-K (in ppm): 103-41-168.

IMG_20160717_125452179 (1)
Jul 17 = Day 41
IMG_20160811_111956691 (1)
Aug 11 = Day 66
IMG_20160811_112354407 (1)
Aug 11 = Day 66.  Snapper peppers are beginning to develop.

Aug 11 = Day 66.  Lower leaves are developing powdery mildew.  Spraying leaves with diluted horticultural oil (1 tbsp oil diluted into 1 quart water in a spray bottle).

Aug 13 = Day 68.  Some hornworms (very small) are found on the plant.  Entire plant is sprayed with a solution of BT, diluted in water (5 mL BT per liter).

Aug 25 = Day 80.  Lower leaves continue to show some signs of powdery mildew, so spraying as needed with diluted horticultural oil (1 tbsp oil diluted into 1 quart water in a spray bottle).

Sep 12 = Day 98.  Plant is battling some powdery mildew and is losing some lower leaves as a result.  This plant is still developing several peppers.

img_20160912_111018165-1
Sep 12 = Day 98
img_20160912_111226457-1
Sep 12 = Day 98.  Several large Snapper peppers are almost ready for harvest.
img_20160913_121746748-1
Sep 13 = Day 99.  Harvested 1 pepper.

Sep 21 = Day 107.  This Snapper pepper plant is looking poor, lots of leaves are falling off due to powdery mildew.  Even though the peppers are not fully ripe yet (have not changed color), I chose to harvest all of the remaining peppers (6) at this time.  These Snapper peppers, combined with my Orange Bell and Lipstick peppers, will be used to make one large batch of Stuffed Peppers.

img_20160921_180240300-1
Sep 21 = Day 107.  Harvested peppers:  6 Snapper (left), 8 Lipstick (middle), 6 Orange Bell (right)

Stuffed Peppers recipe:  Cut peppers in half, remove seeds.  Blanch in boiling water for 3 minutes, then set upside down on paper towels to drain.  To make the filling,  brown 1 lb ground beef, drain the fat, add sauteed onion and garlic.  Add herbs and spices, such as oregano, basil, salt, and black pepper.  Add 1 cup tomato sauce and 2 cups cooked white rice, mix it all together.  Load the filling into the pepper halves.  Cook at 375F for 15 minutes, then top with cheese and put back into oven until cheese melts.

img_20160921_214812049-1
Stuffed Peppers

Sep 22 = Day 108.  Plant was discarded at this time.

Total fluid used = 13 gallons.  Final pH of fluid = 6.5.

Pepper – Orange Bell

pepper-orange-bell-img_0238Jun 6, 2016 = Day 0.  Plant started from seed (Baker Creek).  Seeds sowed in 1.5-inch rockwool cube in 2-inch net-pot.  Moistened with dilute fertilizer solution: 1.2 mL (1/4 tsp) Dyna-Gro Liquid Grow, 0.8 mL pH Down per gallon of tap water.   N-P-K (in ppm): 22-12-13.

Jun 13 = Day 7.  Plant germinated, placed directly under a fluorescent light (2 ft. T8 bulb, 17W, 6500k) for 16 hours per day.

Jun 25 = Day 19.   Installed plant into 11 cup plastic container.   Hydroponic solution is composed of 11 cups (0.69 gal, 2.6 L) tap water, 1.38 g MasterBlend 4-18-38, 1.38 g calcium nitrate, 0.69 g magnesium sulfate, 0.14 mL Dyna-Gro Pro-TeKt, 0.7 mL pH Down.  N-P-K (in ppm): 103-41-168.

IMG_20160626_104844629 (1)
Jun 26 = Day 20

Jul 2 = Day 26.  Starting to let this plant have a few hours of outdoor exposure, to toughen up the plant.

Jul 8 = Day 32.  Plant is now outside all of the time, receiving 4-5 hours sunlight per day.

Jul 17 = Day 41.  Plant installed in 32-gallon bucket.  Hydroponic solution composed of 32 gal (121 L) tap water, 64 g MasterBlend 4-18-38, 64 g calcium nitrate, 32 g magnesium sulfate, 6.4 mL Dyna-Gro Pro-TeKt, 35.2 mL pH Down.  N-P-K (in ppm): 103-41-168.

IMG_20160717_125404358 (1)
Jul 17 = Day 41
IMG_20160811_111927520 (1)
Aug 11 = Day 66

Aug 11 = Day 66.  Plant is flowering, but some of the early blooms were falling off the plant due to lack of pollination.  I began using a cotton swab to pollinate the flowers by hand, and now the fruits are setting properly.  Also, the lower leaves are developing powdery mildew, so I am spraying leaves with diluted horticultural oil (1 tbsp oil diluted into 1 quart water in a spray bottle).

Aug 13 = Day 68.  Some hornworms (very small) are found on the plant.  Entire plant is sprayed with a solution of BT, diluted in water (5 mL BT per liter).

Aug 25 = Day 80.  Lower leaves continue to show some signs of powdery mildew, so spraying as needed with diluted horticultural oil (1 tbsp oil diluted into 1 quart water in a spray bottle).

Sep 12 = Day 98.  Plant is battling some powdery mildew and is losing some lower leaves as a result.  This plant is still developing several peppers.

img_20160912_110834989-1
Sep 12 = Day 98
img_20160912_110756029-1
Sep 12 = Day 98.  Orange Bell peppers are still developing.

Sep 21 = Day 107.  This Orange Bell pepper plant is looking poor, lots of leaves are falling off due to powdery mildew.  Even though the peppers are not fully ripe yet (have not changed color), I chose to harvest all of the remaining peppers (6) at this time.  These Orange Bell peppers, combined with my Snapper and Lipstick peppers, will be used to make one large batch of Stuffed Peppers.

img_20160921_180240300-1
Sep 21 = Day 107.  Harvested peppers:  6 Snapper (left), 8 Lipstick (middle), 6 Orange Bell (right)

Stuffed Peppers recipe:  Cut peppers in half, remove seeds.  Blanch in boiling water for 3 minutes, then set upside down on paper towels to drain.  To make the filling,  brown 1 lb ground beef, drain the fat, add sauteed onion and garlic.  Add herbs and spices, such as oregano, basil, salt, and black pepper.  Add 1 cup tomato sauce and 2 cups cooked white rice, mix it all together.  Load the filling into the pepper halves.  Cook at 375F for 15 minutes, then top with cheese and put back into oven until cheese melts.

img_20160921_214812049-1
Stuffed Peppers

Sep 22 = Day 108.  Plant was discarded at this time.

Total fluid used = 12.5 gallons.  Final pH of fluid = 6.5.

Pepper – Lipstick

lipstick-pepper-webJun 6, 2016 = Day 0.  Plant started from seed (Baker Creek).  Seeds sowed in 1.5-inch rockwool cube in 2-inch net-pot.  Moistened with dilute fertilizer solution: 1.2 mL (1/4 tsp) Dyna-Gro Liquid Grow, 0.8 mL pH Down per gallon of tap water.   N-P-K (in ppm): 22-12-13.

Jun 15 = Day 0.  Started 3 new seeds, since the first 2 seeds did not germinate.  Based on the fact that I started with a packet of 35 seeds, and the first 2 seeds did not germinate, the maximum viability of the seeds is 27/35, or 77%.  Learn more about calculating seed viability on the Seed Storage page.

Jun 25 = Day 10.  1 seed has germinated, placed directly under a fluorescent light (2 ft. T8 bulb, 17W, 6500k) for 16 hours per day.

IMG_20160705_101559139 (2)
Jul 5 = Day 20

Jul 13 = Day 28.  Starting to let this plant have a few hours of outdoor exposure, to toughen up the plant.

Jul 15 = Day 30.  Plant is now outside all of the time, receiving 4-5 hours sunlight per day.

Jul 17 = Day 32.  Installed plant into a 5-gallon bucket.  Hydroponic solution composed of 5 gal (18.9 L) tap water, 10 g MasterBlend 4-18-38, 10 g calcium nitrate, 5 g magnesium sulfate, 1 mL Dyna-Gro Pro-TeKt, 5 mL pH Down.   N-P-K (in ppm): 103-41-168.

IMG_20160717_125523815 (1)
Jul 17 = Day 32
IMG_20160811_112014128 (1)
Aug 11 = Day 57

Aug 13 = Day 59.  Some hornworms (very small) are found on the plant.  Entire plant is sprayed with a solution of BT, diluted in water (5 mL BT per liter).

Aug 25 = Day 71.  Lower leaves showing some signs of powdery mildew, so spraying as needed with diluted horticultural oil (1 tbsp oil diluted into 1 quart water in a spray bottle).

Sep 4 = Day 81.  Container was getting light, so I added 1 gallon of fresh hydroponic fluid.

Sep 11 = Day 88.  Added 1.25 gallon of fresh hydroponic fluid.

Sep 12 = Day 89.  Plant is battling some powdery mildew and is losing some lower leaves as a result.  This plant is still developing several peppers.

img_20160912_110859509-1
Sep 12 = Day 89
img_20160912_110947638-1
Sep 12 = Day 89.  Lipstick peppers developing.

Sep 21 = Day 98.  This Lipstick pepper plant is looking poor, lots of leaves are falling off due to powdery mildew.  Even though the peppers are not fully ripe yet (have not changed color), I chose to harvest all of the remaining peppers (8) at this time.  These Lipstick peppers, combined with my Snapper and Orange Bell peppers, will be used to make one large batch of Stuffed Peppers.

img_20160921_180240300-1
Sep 21 = Day 98.  Harvested peppers:  6 Snapper (left), 8 Lipstick (middle), 6 Orange Bell (right)

Stuffed Peppers recipe:  Cut peppers in half, remove seeds.  Blanch in boiling water for 3 minutes, then set upside down on paper towels to drain.  To make the filling,  brown 1 lb ground beef, drain the fat, add sauteed onion and garlic.  Add herbs and spices, such as oregano, basil, salt, and black pepper.  Add 1 cup tomato sauce and 2 cups cooked white rice, mix it all together.  Load the filling into the pepper halves.  Cook at 375F for 15 minutes, then top with cheese and put back into oven until cheese melts.

img_20160921_214816663-1
Stuffed peppers.  The Lipstick peppers were a bit small, so some of the peppers were cut up and thrown into the filling, while the rest were stuffed (small baking dish on the left).

Sep 22 = Day 108.  Plant was discarded at this time.  Total fluid used = 5.25 gallons.

Pepper – Jimmy Nardello

jimmynardello2010_2080_detailThe days are getting longer, the temperatures are warming up, springtime is almost here. It is time to start getting some warm-season plants up and running, so I will be able to set them outside by around the end of March. I will start 2 types of peppers (Golden Marconi and Jimmy Nardello), as well as Diva cucumbers. My tomato seeds have been ordered, and those plants will also be started shortly.

Feb 13, 2016 = Day 0.  Plant started from seed (Bountiful Gardens).  Seeds sowed in 1.5-inch rockwool cube in 2-inch net-pot. Moistened with dilute fertilizer solution: 1.2 mL Dyna-Gro Liquid GROW 7-9-5 and 0.8 mL pH Down per gallon of tap water.  N-P-K (in ppm): 22-12-13.  pH = 6.0.

Feb 20 = Day 7.  Plants germinated, placed directly under a fluorescent light (2 ft. T8 bulb, 17W, 6500k) for 16 hours per day.

IMG_20160228_145148892 (1)
Feb 28 = Day 15

Mar 1 = Day 17.  Began placing plant in an open window for several hours per day, to get seedling ready for the transition to the outdoors.

Mar 6 = Day 22.  Transferred plant to a small plastic container.  Hydroponic solution composed of 2.75 cups (0.65 L) tap water, 1 mL Dyna-Gro Liquid GROW 7-9-5.  N-P-K (in ppm): 111-62-66.  pH = 6.0.  No pH adjustment required.

Mar 17 = Day 33.  Plant looks great, 5 inches tall.  Almost no root development at all though.  Switched to a different hydroponic solution:  2.75 cups (0.65 L) tap water, 0.34 g MasterBlend 4-18-38, 0.34 g calcium nitrate, 0.17 g magnesium sulfate, 0.034 mL Dyna-Gro Pro-TeKt, 0.17 mL pH Down.  N-P-K (in ppm): 103-41-168.  pH = 6.0.  Plant moved outside during the day, inside at night.

IMG_20160317_125751601 (1)
Mar 17 = Day 33

Mar 27 = Day 43.  Installed plant into 5-gallon bucket.  Hydroponic solution composed of 5 gal (18.9 L) tap water, 10 g Masterblend, 10 g calcium nitrate, 5 g magnesium sulfate, 1 mL Dyna-Gro Pro-TeKt, 5 mL pH Down.  N-P-K (in ppm): 103-41-168.  pH = 6.0.  Plant placed outside permanently.

IMG_20160329_135331807 (1)
Mar 29 = Day 45
IMG_20160419_103609940 (1)
Apr 19 = Day 66.  Plant is flowering.
IMG_20160502_104709451 (1)
May 2 = Day 79.  Peppers are developing.
IMG_20160526_141318982 (1)
May 26 = Day 103.  Jimmy Nardello (left), Golden Marconi (right)
IMG_20160526_141400463 (1)
May 26 = Day 103.  9 peppers are currently developing, the largest one is 6-inches long.

May 28 = Day 105.  Installed a wire cage around the pepper plant to keep it standing upright.

Jun 5 = Day 113.  Added 1 gallon fresh hydroponic fluid.

Jun 16 = Day 124.  Added 1.5 gallon fresh hydroponic fluid.

IMG_20160616_174828691 (1)
Jun 16 = Day 124.  Jimmy Nardello (left), Golden Marconi (right)
IMG_20160616_174928107 (1)
Jun 16 = Day 124.  Lots of peppers developing.
IMG_20160622_112215384 (1)
Jun 22 = Day 130.  Peppers starting to ripen.

Jun 26 = Day 134.  Harvested the first 2 ripe Jimmy Nardello peppers of the season.

IMG_20160626_104502130 (1)
Jun 26 = Day 134.  Jimmy Nardello (top), Golden Marconi (bottom)

Jun 30 = Day 138.  Harvested 2 peppers.

Jul 1 = Day 139.  Added 2 gallons fresh hydroponic fluid.

Jul 5 = Day 143.  Harvested 2 small peppers.

IMG_20160705_100947467 (1)
Jul 5 = Day 143.  Jimmy Nardello (left), Golden Marconi (right)

Jul 11 = Day 149.  Added 2 gallons fresh hydroponic fluid.

Jul 13 = Day 151.  Harvested 1 pepper.

Jul 15 = Day 153.  Plant is beginning to develop powdery mildew on many of the leaves.  Sprayed the leaves (top and bottom) with my homemade anti-fungal spray:  1 qt water, 1 tsp potassium bicarbonate, 1 tsp horticultural oil, 10 drops Dr. Bronner’s liquid soap.

Jul 16 = Day 154.  Harvested 6 peppers.

IMG_20160716_185002168 (1)
Jul 16 = Day 154.  Jimmy Nardello (left), Golden Marconi (right)

Jul 19 = Day 157.  Harvested 10 peppers.

Jul 22 = Day 160.  Added 1.25 gallons fresh hydroponic fluid.

IMG_20160724_092755689 (1)
Jul 24 = Day 162.  Harvested 2 small peppers today.

Jul 25 = Day 163.  Harvested 7 peppers.

Jul 27 = Day 165.  Harvested 1 pepper.

Jul 30 = Day 168.  Harvested 8 peppers.

Aug 2 = Day 171.  Added 1 gallon fresh hydroponic fluid.

Aug 6 = Day 175.  Harvested 6 peppers.

Aug 11 = Day 180.  Harvested 8 peppers.  No more peppers are developing, but the plant does have new leaves at the top and some new flowers.  Overall, most of the leaves on the plant are in poor shape though, so the plant was discarded at this time.  This plant did very well.  The peppers were not large, but they were abundant and they had a nice sweet flavor.

Final statistics:
Total Harvest: 55 Jimmy Nardello peppers.
Total fluid used: 10 gallons.

Pepper – Golden Marconi

pp127-golden-marconiThe days are getting longer, the temperatures are warming up, springtime is almost here.  It is time to start getting some warm-season plants up and running, so I will be able to set them outside by around the end of March.  I will start 2 types of peppers (Golden Marconi and Jimmy Nardello), as well as Diva cucumbers.  My tomato seeds have been ordered, and those plants will also be started shortly.

Feb 13, 2016 = Day 0.  Plant started from seed (Baker Creek).  Seeds sowed in 1.5-inch rockwool cube in 2-inch net-pot.  Moistened with dilute fertilizer solution: 1.2 mL Dyna-Gro Liquid GROW 7-9-5 and 0.8 mL pH Down per gallon of tap water. N-P-K (in ppm): 22-12-13.  pH = 6.0.

Feb 22 = Day 9.  Plants germinated, placed directly under a fluorescent light (2 ft. T8 bulb, 17W, 6500k) for 16 hours per day.

IMG_20160228_145252166 (1)
Feb 28 = Day 15

Mar 1 = Day 17.  Began placing plant in an open window for several hours per day, to get seedling ready for the transition to the outdoors.

Mar 6 = Day 22.  Transferred plant to a small plastic container.  Hydroponic solution composed of 3 cups (0.71 L) tap water, 1.125 mL Dyna-Gro Liquid GROW 7-9-5.  N-P-K (in ppm): 111-62-66.  pH = 6.0.  No pH adjustment required.

Mar 17 = Day 33.  Plant looks great, 5 inches tall.  Almost no root development at all though.  Switched to a different hydroponic solution:  2.75 cups (0.65 L) tap water, 0.34 g MasterBlend 4-18-38, 0.34 g calcium nitrate, 0.17 g magnesium sulfate, 0.034 mL Dyna-Gro Pro-TeKt, 0.17 mL pH Down.  N-P-K (in ppm): 103-41-168.  pH = 6.0.

IMG_20160317_125838980 (1)
Mar 17 = Day 33

Mar 27 = Day 43.  Installed plants into 5-gallon bucket.  Hydroponic solution composed of 5 gal (18.9 L) tap water, 10 g Masterblend, 10 g calcium nitrate, 5 g magnesium sulfate, 1 mL Dyna-Gro Pro-TeKt, 5 mL pH Down.  N-P-K (in ppm): 103-41-168.  pH = 6.0.  Plant placed outside permanently.

IMG_20160329_140553866 (1)
Mar 29 = Day 45
IMG_20160419_103625505 (1)
Apr 19 = Day 66.  Plant is flowering.
IMG_20160423_100325911 (1)
Apr 23 = Day 70.  First pepper is developing.
IMG_20160502_104717830 (1)
May 2 = Day 79.  Peppers are developing.
IMG_20160514_184808181 (1)
May 14 = Day 91.  Found this little guy near the top of the plant.  He doesn’t seem to be doing much damage, so “live and let live”.
IMG_20160526_141318982 (1)
May 26 = Day 103.  Jimmy Nardello (left), Golden Marconi (right)
IMG_20160526_141340433 (1)
May 26 = Day 103.  6 peppers are developing, the longest one is 8-inches long.

Jun 5 = Day 113.  Added 1 gallon fresh hydroponic fluid.  Installed a wire cage around the pepper plant to keep it standing upright.

Jun 16 = Day 124.  Added 2 gallons fresh hydroponic fluid.

IMG_20160616_174828691 (1)
Jun 16 = Day 124.  Jimmy Nardello (left), Golden Marconi (right)
IMG_20160616_174852708 (1)
Jun 16 = Day 124.  Lots of peppers developing.
IMG_20160622_112239902 (1)
Jun 22 = Day 130.  Peppers starting to ripen.

Jun 26 = Day 134.  Harvested the first ripe Golden Marconi pepper of the season.

IMG_20160626_104502130 (1)
Jun 26 = Day 134.  Jimmy Nardello (top), Golden Marconi (bottom)

Jun 30 = Day 138.  Harvested 1 pepper.

Jul 1 = Day 139.  Added 2 gallons fresh hydroponic fluid.

IMG_20160705_100947467 (1)
Jul 5 = Day 143.  Jimmy Nardello (left), Golden Marconi (right)

Jul 11 = Day 149.  Added 2 gallons fresh hydroponic fluid.

Jul 15 = Day 153.  Plant is beginning to develop powdery mildew on many of the leaves.  Sprayed the leaves (top and bottom) with my homemade anti-fungal spray:  1 qt water, 1 tsp potassium bicarbonate, 1 tsp horticultural oil, 10 drops Dr. Bronner’s liquid soap.

IMG_20160716_185002168 (1)
Jul 16 = Day 154.  Jimmy Nardello (left), Golden Marconi (right)

Jul 22 = Day 160.  Added 1 gallon fresh hydroponic fluid.

IMG_20160724_092824023 (1)
Jul 24 = Day 162.  Many peppers now ripening.  Harvested 2 peppers today.

Jul 25 = Day 163.  Harvested 6 peppers.

Jul 27 = Day 165.  Harvested 2 peppers.

Jul 30 = Day 168.  Harvested 3 peppers.

Aug 2 = Day 171.  Harvested 4 peppers.  There are no more peppers developing, and the leaves are in bad shape, so this is the end for this plant.

Growing this Golden Marconi plant was well worth the effort.  The peppers were delicious, with a bit of sweetness, and they had thick, juicy walls and thin skins.  I will definitely grow this one again in the future, but I will probably use a bigger container than the 5-gallon bucket I used here.  As the summer got warm, I had to add fluid every week or 2.  This plant would do great in a 20- or 32-gallon bucket.

Final statistics:
Total Harvest: 19 Golden Marconi peppers.
Total fluid used: 12 gallons.

Tomatoes, Peppers, Mint – GUEST POST

In this post, I will be sharing some photos from Matt Garver, a gardener who has had great success growing hydroponically using a variety of methods.  His photos are very instructional for anyone looking to get started with growing.  Check out his YouTube channel here.

In this first set of photos, a tomato plant is shown growing inside an office, using an 18-gallon plastic tote.  The tomato variety is Patio Princess from Burpee, which is a great variety for growing inside since the plants stay small (about 2 feet tall).  Imagine how great it would be to impress your co-workers with freshly grown tomatoes all year long!  To see a timeline of the tomato plants’ growth, click here.

2015-03-30 17.27.582015-05-20 17.40.462015-03-30 12.42.23 HDR-2

The next set of photos shows a connected bucket system in a greenhouse.  This system may seem complicated, but it is very simple.  There is a large outdoor reservoir, connected to a smaller ‘control bucket’ which contains a float valve, just like in a toilet tank.  When the fluid level in the control bucket gets low, the float valve opens and fluid flows in from the reservoir.  Using plastic tubing, the control bucket is connected to a series of other ‘grow buckets’ inside the greenhouse.  Since the buckets are connected, the fluid level in the grow buckets is then always kept at the same level as the control bucket.  The beauty of this system is that it requires no electricity, and it is much more convenient than having to monitor the fluid levels in each of the grow buckets individually.  Peppers and tomatoes are shown successfully growing in this system:

Kratky Connected Buckets ReservoirsKratky Bucket Reservoir and FloatKratky Connected BucketsKratky Bucket Tomatoes

Here are a few examples of simple, self-contained Kratky hydroponics.  A Ghost pepper plant grown in a large plastic trash container:

Kratky Ghost PepperKratky Ghost Pepper Roots

Peppermint plant grown in a large plastic trash container:

Kratky PeppermintKratky Peppermint Roots

Lettuce grown in a plastic tote:

Kratky LettuceKratky Lettuce Roots

In the final set of photos, we can see the effects of adding an air pump to the system.  Using an air pump means getting away from the ultra-simple Kratky method, and approaching the more complex Deep Water Culture (DWC) system.  Although electricity is now required, oxygenating the water with an air pump does seem to result in plants that are more productive.  This is in agreement with what Bobby Smith (mhpgardener on YouTube) has described in this video.  These Garden Salsa pepper plants are grown in 5-gallon buckets, with aeration (left) or without aeration (right):

DWC Garden Salsa Hot PepperKratky Bucket Garden Salsa Peppers

Thanks to Matt Garver for supplying these excellent photos of hydroponics in action!

Pepper – Lipstick

lipstick-pepper-webLipstick is a 4-inch long, red tapered variety of pepper.

Apr 14, 2015 = Day 0.  Plant started from seed (Baker Creek).  Moistened with dilute fertilizer:  Dyna-Gro Liquid GROW 7-9-5, diluted 1 mL (1/5 tsp) per gallon of tap water. N-P-K (in ppm): 18-10-11.  pH = 7.0.

Apr 25, 2015 = Day 11.  Seeds germinated.  Transferred to grow room, receiving 14 hours LED grow-light per day.

May 6, 2015 = Day 22.  Plant installed in 5-gallon bucket.  Hydroponic solution composed of 5 gal tap water, 10 g MasterBlend 4-18-38, 10 g calcium nitrate, 5 g magnesium sulfate, 1 mL Dyna-Gro Pro-TeKt, 4 mL pH Down.  N-P-K (in ppm): 103-41-168.  pH = 6.5.

Jun 15, 2015 = Day 62.  Plant is beginning to flower.

pepper-lipstick
Jun 26, 2015 = Day 73

This plant was growing in a small closet, using an overhead LED grow light and a fan for air flow.  The foliage on this plant was beautiful, and many flowers had developed, but I could never get the plant to set fruit.  My theory was that the humidity in the room was too high to allow fruit setting.  I left the closet door cracked open, but this room was still warm and humid much of the time.   I even tried hand pollinating using a cotton swab, but still was unsuccessful.  Plant was discarded at the end of July.  I hope to try this one again sometime.